In today's tutorial I will be playing the role of The Wolf and we'll cover a quick image fix, Gimp style. If you have no idea who The Wolf is you need to watch Pulp Fiction again ;) If you would like to follow along but don't have Gimp's free photo editing software feel free to download it here.
Choose Photo
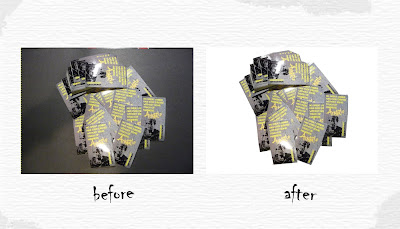
After you download and open Gimp choose a file that you would like to work with, or you can use ours (just right click save). We decided to go with a picture of our business cards; the picture is ok but its uses are limited because of its background. We will walk through removing the image's background step by step. Just click on the pictures as we go to make them bigger ;)
Open Photo
If this is your first time using Gimp, or a computer ;), open a file by going File>Open and then locate and double click on the photo you would like to work with. Once the file is open you will notice several things on the screen. On the left hand side of the screen you will see your basic tools while on the right hand side of the screen you will see your layers, channels, brushes, gradients dialogs etc. Feel free to reposition and resize these window as you see fit :)
Our photo is now open and you can see that it has a black paper background, our goal is to remove the black paper.
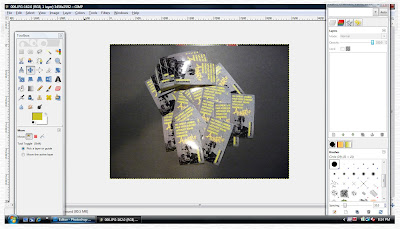
Gimp offers a bunch of tools so we're going to take a quick look at a few of them and see how successful they are in helping us remove the background from our image.
Fuzzy Select Tool
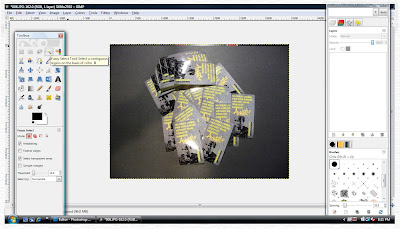
The first tool we're trying is the fuzzy select tool. This tool is similar to the magic wand tool in Adobe's Creative Suite software. Select this tool and click on an area on the left side of your image and you will see what it does :) A selection of your image should now be active. Hit delete (not backspace) and this should remove the selected area like so:
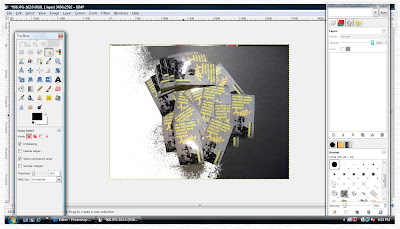
That was pretty good but it left a bit of noise around the left side of our image. Let's give the next tool a shot.
Color Select Tool

The idea behind the color select tool is that we can click on a specific color in our image and all parts of our image that are that color will become active and we can edit them. In an ideal world if we click on the black on the right side of our image it will all be selected and we can delete it. Let's click on the black on the right side of our image and hit delete and see what happens :)

Well, good news is this deleted some more of our background, bad news is the black was too similar to the color in our business cards and deleted parts of the image that we want to keep. Let's undo the color select, Edit>Undo Color Select. While the color select tool may work well for your image it wasn't very helpful for ours.
We should now be looking at the same image we had after using the fuzzy select tool. Let's use the fuzzy select tool on the right side of the image (not pictured). Now let's take a look at one final tool.
Free Select Tool
This tool is similar to the lasso tool in Adobe's Creative Suite software. This tool will allow us to lasso and select specific areas of our image. Let's use this tool to select some of the noise on the bottom right of our image. Just lasso around the area.
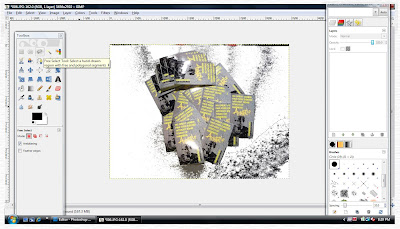
Once this area is selected we can now hit delete and this will remove the selection.
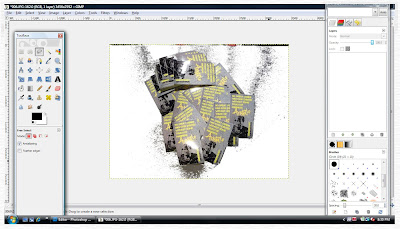
Wow, that looks like what we're after. The free select tool removed the unwanted black background from our image and didn't leave any noise. Let's use the free select tool to clean up the rest of the image. To do this we're going to outline the area that we want to keep. Once the area that we want to keep is fully selected and active right click>select>invert and then hit delete.
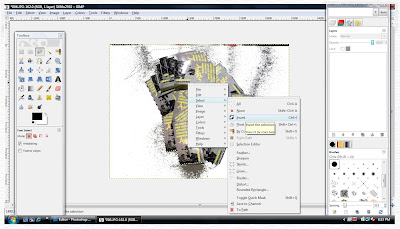
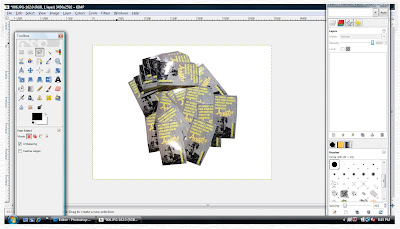
Inverting the selection chooses everyhing except the area we outlined with the free select tool. When we hit delete we are now left with our business cards on a white background. There may be a few spots left so feel free to use the free transform tool to give your image one last good cleaning.
Time to smile, you have now successfully removed the background from your image =) It seems to us that the best technique for removing the background from an image in Gimp would be a combination of the fuzzy select tool and the free select tool.
A quick before and after just to recap:
Now using the image we just created we can make a new banner:

Conclusion
Some quick observations from Mr. Wolfe. Well, it even took The Wolf a little while to pull this one off using the Gimp. While Gimp is a great option for free software it ran a little slow on my computer, granted I could just have too much stuff on my computer so I won't hold this against Gimp. After using Picasa last week (last week's tutorial), Gimp, while designed for more detailed editing, is definitely not as intuitive as Picasa. This was our first time using both programs.
If you found this tutorial somewhat useful and would like to purchase some basic software that would allow you to perform similar tasks (and way more) we highly recommend Adobe's Creative Suite lineup. Mr. Wolfe can make the same adjustments to an image in Adobe's Photoshop Elements software in roughly 3 minutes and 37 seconds ;)
We hope you enjoyed this tutorial and that it was somewhat helpful. If you have any questions just let us know in the comments section and we will be sure to get back to you. If there's anything else you would like to see covered just leave a comment and we'll see if we can make it happen. Have a senioritis day!

Thanks for the tutorial :D!! Gimp is pretty nice, and it's open source, right :)? I have Photoshop at home but it's nice to have a free and convenient tool like Gimp :).
ReplyDeleteNo problem, thanks for the feedback Digicute. Yes, Gimp is open source; we agree it's a nice tool to have if/when Photoshop is not acessible.
ReplyDeletehuh. most useful!
ReplyDeleteWow... you seem to solve the mystery for some using freeware..LOL!
ReplyDeleteGreat info for those who has an interest in this area ;D
Thanks a bunch Sophine, we were looking to give people a quick how to on basic photo editing using only freeware ;)
ReplyDeleteGlad you find the info useful Gremlina!
If there are any other topics people would like to see covered just let us know.
Awesome tutorial! You must have a steady hand too, because this is very similar to the method I use to remove backgrounds but mine are never this clean. Nice work!
ReplyDeleteThanks so much Holly :) One tip we forgot to mention that helps out a bit is zooming in 200% or more when using the free select/lasso type tools sometimes helps you find object edges a little easier.
ReplyDeleteThanks for the tips on Gimp. I use photoshop elements but am trying to use Gimp some too. I really would like some help making florals into modern/vintage looking art. I have seen some with grunge looking brushes or backgrounds and dark borders that just look great. So far mine don't look quite as good. If you have any tips or a tutorial it might be one to post.
ReplyDeleteThanks for checking out our tutorial ArtGalleryRiverRd.com, we have received a few requests for vintage looking images; we'll see what we can put together.
ReplyDeleteNice tutorial, if you want to know more photo editing tips and tricks I can recommend you to read this article http://softwarehdr.com/ sure it will be useful for you.
ReplyDeleteWow! This could be one of the most useful blogs we have ever come across on thesubject. Actually excellent info! I’m also an expert in this topic so I can understand your effort.
ReplyDeletegogy games unblocked
play game friv
1 player games unblocked at school
I’m not positive where you are getting your info, but good topic. I must spend some time learning much more or working out more. Thanks for great information I used to be looking for this info for my mission. jogos io 2019
ReplyDeletefriv Games play
2player for free
This was dinner tonight at our house... I am too tired some days to come up with fantastic or extravagant meal ideas, plus the kids don't eat my best meals anyways. Tonight I wanted them to get some good calories so I added sausage to the recipe. It's delicious and hearty and best of all, it's super easy.
ReplyDeleteGeesh, what an ego on this one. Sure hope he and those other Founding Fathers can put in a few clauses about women’s independence in all those documents they’re fighting about because being unable to own property or vote, and precluded by sex from 98 percent of jobs in the Colonies is really slowing down my game. I’d dump this jerk in a heartbeat if I had more options.
free games online 2019
jogos friv gratis 2019
jogos 360 games
Wonderful Tutorial, thanks for putting this together! This is obviously one great post. Thanks for the valuable information .
ReplyDeleteLook For a Qualified Professionals Santa Clarita Sub Zero Refrigerator Repair Service
ReplyDeleteIt is truely good post, but I do not see everything completely clear, especially for someone not involved in that topic. Anyway very interesting to me. https://royalcbd.com/product/cbd-roll-on-gel/
ReplyDeleteI would like to thank you for the efforts you have made in writing this article. I am hoping the same best work from you in the future as well. Thanks... purchase 20 instagram likes
ReplyDeleteDo a little research of your own concerning the different brick types either online or at your local brick yard, suggest a brick type as a possible selection to the salesman and see if he/she runs only with that selection or if they offer something different. seal coat
ReplyDelete